CDNs or content delivery networks geographically distribute proxy servers or data centers. With the ability to improve its performance and availability of websites, it spatially distributes services to the end-users.
Table of Contents
As you might have realized, CDNs are a great way to improve page loading speed and Cloudflare is perhaps the best option in the market. With its exceptional service quality, installing Cloudflare CDN in WordPress is necessary. The fact that it is free to avail, you cannot avoid but to have it set up for your WordPress sites.
Cloudflare offers some of the best free services, which is why it is one of the most popular plugins for WordPress sites. So start using these guidelines to install Cloudflare now and see the difference it makes to your website.
Why do you need Cloudflare CDN?
In comparison to other CDNs, Cloudflare has some attractive features that make it stand out. It allows making the process of SSL certification easier. It mitigates the DDoS attacks and sets the gateway for all network protocols. Alongside this, it provides analytics for all requests you make to a website.
Cloudflare provides a wider expanse of a network, unlike any other CDNs. Thus, it helps visitors to deliver the experience of faster websites. This aids in improving SEO, which is a prominent factor for ranking websites.
Ways to setup Cloudflare CDN in WordPress
Step 1: Configure the website of Cloudflare
In case, the web host does not permit activation of Cloudflare through cPanel, follow these steps:
1. Visit the site of Cloudflare and sign up.
2. Directing you to the registration page, you have to fill in your details and create an account.
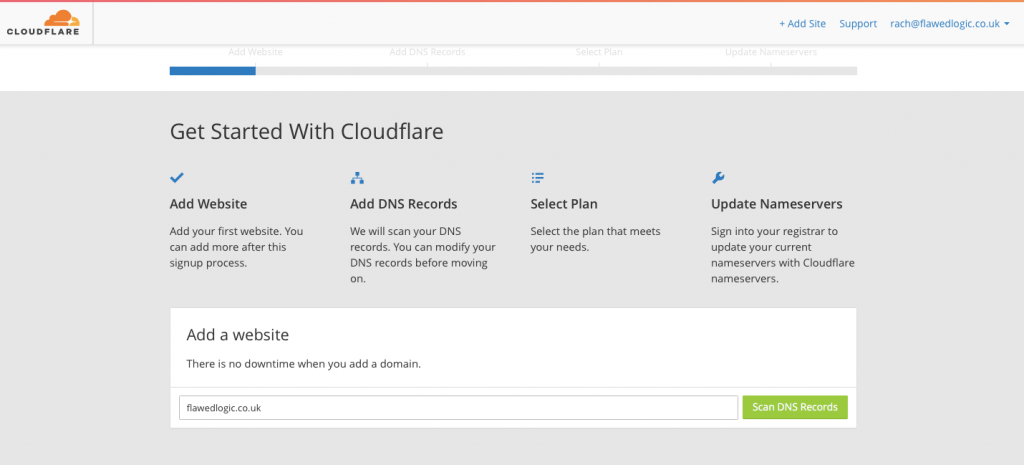
3. You have to enter your domain and click on ‘scan DNS records’.
4. After the scanning process is over, hit on ‘continue’. A screen will appear with DNS settings that are auto-detected that you need to verify. In this step, make sure to enable it for both of your domains but disable it for mail services as well as FTP.
5. Scroll down and press on the ‘continue’ button.
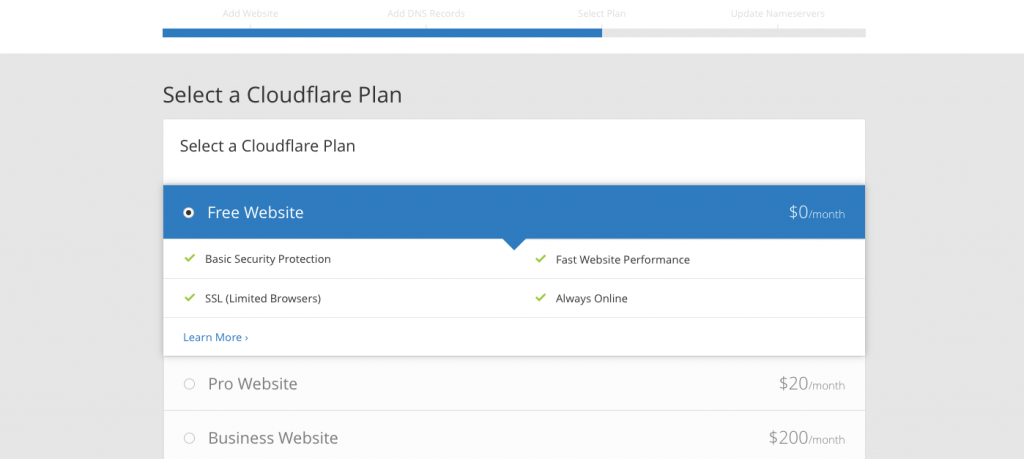
6. Choose your plan and click on the ‘free website’ option for Cloudflare CDN in WordPress.
7. The final step provides all Cloudflare nameservers and changes registrar settings. This may require at least 24 hours for the identification of nameservers.
8. After successfully changing the nameserver from the registrar, head back to Cloudflare and hit on the button named ‘Recheck nameservers’. This step is crucial for you to identify the queue.
Alternative step: Cloudflare installation through dashboard hosting
Web hosts namely Bluehost provides easier installation procedures for Cloudflare using the cPanel. For that, you need to register at first for which the steps are as follows:
1. Visit the site of Cloudflare and sign in with a proper email address and password.
2. You may have to enter details on the registration page in case they are not filled beforehand.
3. Click the ‘create account’ button to create Cloudflare CDN in WordPress. You do not have to continue with all the steps until scanning records of DNS, which the WebHost can take care of.
4. In the cPanel of WebHost, enter username and password for signing up.
5. Head to the settings page of Cloudflare and hit on ‘activate’. This will turn on the Cloudflare. In case you have already set up the site using Cloudflare, you can simply take advantage of its settings from cPanel. You will be able to delete or even disable the site from the website.
6. After enabling Cloudflare, you can access statistics as well as settings from the cPanel dashboard.
Step 2: Setting the Cloudflare plugin for WordPress
WordPress plugins are essential to solve any issue with your WordPress sites. Plugins provide easier solutions for people who lack critical technical knowhow.
Thus, using a plugin for developing Cloudflare CDN in WordPress will help to avoid understanding of the functionalities. Rather users have the freedom to directly access dashboards.
The plugin is feature-rich and allows users to save WordPress settings using a click. It automatically purges cache on updating the site. Having the provision for direct access to settings and WordPress dashboard, it also supports HTTP2 servers or even Server Push. This allows push notifications on browsers. Additionally, paid accounts can also avail firewalls specifically for WordPress.
The steps to set up the Cloudflare plugins are as follows:
1. From the Wordpress dashboard, reach out to the Plugins option and then to Add New. Here, you need to search for Cloudflare.
2. Press on the Install button and see whether it changes to blue on activation. This will direct you to the plugin’s page.
3. On clicking the link from the settings page, you will sign in to your account of Cloudflare. Furthermore, enter the email address and the API key. On saving credentials, you will head to the homepage of Cloudflare settings.
4. You can also use the one-click settings for better optimization of your site. After this, click the ‘Apply’ button.
5. Activate the option for Cloudflare to flush out its cache automatically when the site is updated. To do so, enable the option for ‘Automatic Cache management’. Thus, Cloudflare stops you from sending outdated versions for the site.
6. On clicking the link of settings, you will be able to review it and make changes as required.
7. Clicking on the link labeled as ‘Analytics’, you will be able to view sites, use of bandwidth as well as country threats.
Advanced settings of Cloudflare CDN in WordPress
Some of the advanced settings of the Cloudflare plugin are as follows:
1. Mode of Under attack
Enabling this mode will help to protect the website from DDoS attacks. While every level of the page is analyzed for threats, visitors can view an interstitial page.
2. Security level
Cloudflare offers the option from ‘Essentially Off’ and ‘Under Attack’. By default, if you keep it medium, it will require captcha for threatening visitors. At times, Cloudflare considers petty issues as threatening and that is when a visitor may complain of denied access for illegitimate reasons. As a fact, you may have to reduce the security level down to a low rate.
3. Availability of online services
Even if the system goes offline, it saves a cached version of your website to the servers.
4. Cached HTML
The cached content of HTML helps in reducing bandwidth for users who are not registered. In that case, it projects only the custom content of the registered users from the cookie.
5. Advanced DDoS
It protects networks from DDoS attacks irrespective of the duration as well as the size of attacks.
6. Optimization of the image
Cached images optimize it by reducing file size. This renders faster delivery for mobile users or people using slower connections.
7. Development Mode
Settings provide an option for development mode, which on activating will allow you to avoid Cloudflare cache. Observe the site modifications that make it important in times of design tweaks and serious developmental work for the site.
8. Firewall for web application
It helps to identify threats and block all forms of malicious attacks to the WordPress sites.
9. Automatic HTTP
Once you sign up for Cloudflare, you can avail of free certificates of SSL. It will allow changing ‘HTTP’ to ‘HTTPS’ inclusive of the links and resources of the site.
Bottom Line: CDNs play an important role in improving the speed of the website. Among all, Cloudflare can be the best option for its reliability, security and high performance. Having the chance to set up a free version of Cloudflare CDN in WordPress you just have to sign in and include the domain name.
Additionally, check DNS records and activate services for your domain name. Pointing domain name to the nameserver of Cloudflare and installing WordPress plug-in for the same can be easy. Thus, installing the Cloudflare plugin can be the way for an easier configuration.


