Automatically share posts to Facebook
It becomes a great method of marketing and promotion when you automatically share posts to Facebook from your WordPress platform. The largest source of traffic for considerable websites is from Facebook.
Table of Contents
Directly posting to the social media through your WordPress can help you in increasing your social media reach and traffic. You will learn how to do exactly this in an efficient manner in this article.
USE Buffer to automatically share posts to Facebook
You can schedule online status update for your social media profiles like Facebook through Buffer which is an online tool. Sign up for a buffer account by visiting its website.
One of the major advantages with buffer is that you can select a specific time when you intend to share your posts. Regardless of the time of publishing, you can always select an optimal time for sharing the post.
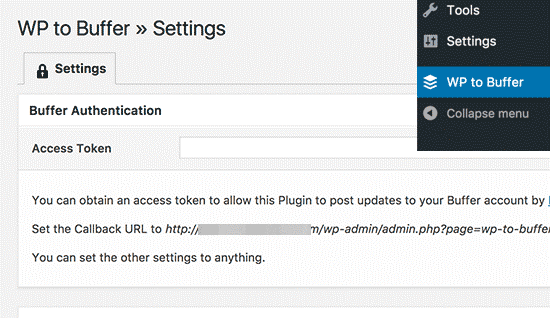
Connect your WordPress site with the buffer account after successfully signing up for the same. After the activation is done you must configure the plugin settings by going to the WP to buffer page. To connect your WordPress site to Buffer you will require an access token.
You can easily spot a call back URL below the access token field. Copy this URL to the clipboard as it will be required in the next steps.
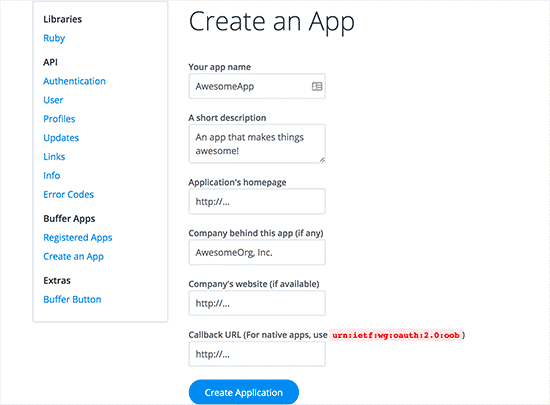
Now create an app button and head over to the Buffer Developers website. You will have to fill up a form and provide the description and name of your app, the callback URL (copied in the clipboard), and your website URL from the plugin’s Settings page.
To continue click on the ‘Create Application’ button and Buffer will create your app. You can get the access token on the next page and it will also show you the API keys.
On your WordPress site visit the plugin’s Settings page and paste the access token. Store the settings by clicking on the save button.
The plugin WordPress to buffer will now connect the buffer account to your WordPress site. Two new tabs i.e. labeled pages and posts will be seen on plugin’s settings page once it is connected.
In order to configure the manner in which you want to share your posts, you must click on the posts tab.
Your connected social media profiles can be seen. In case you have not added any social media account on the buffer account you can easily do that by going to your Buffer account and adding them to automatically share posts to Facebook.
All you have to do is select the particular social media handle and then check the box to enable account option.
To automate the process for all the social media handles the same procedure can be repeated.
You will find the publish option where you must check the Enable option and the plugin will show you more options.
You can add tags and create a custom message. Facebook will automatically fetch post description, title, and featured images from your open graph metadata settings after you add your post URL.
Store the settings by clicking on the save button without fail for applying the changes made by you.
The procedure concludes here and after this, your newly published posts will be added by the WP to Buffer Plugin to your Buffer queue and then it will be automatically posted to Facebook.
USE IFTTT to automatically share posts to Facebook
The popular online tool that makes the internet work for you and automates your online accounts is IFTTT. It stands for If This Then That. You can define applets with this. You are connected to two online accounts with each applet.
On one account basically looks for a trigger and as soon as it finds one, your predefined action is performed on the other account. When you publish a new post through IFTTT you can automatically share posts to Facebook in the following manner.
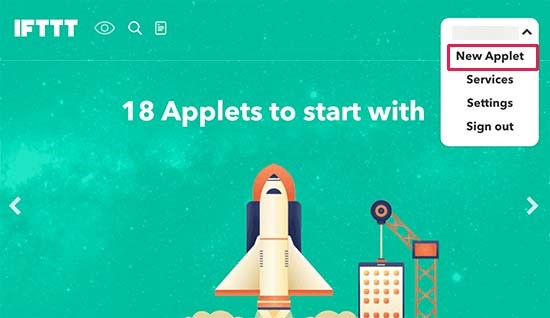
Create a new account by visiting the IFTTT website. Click on your username and select New Applet option after signing up.
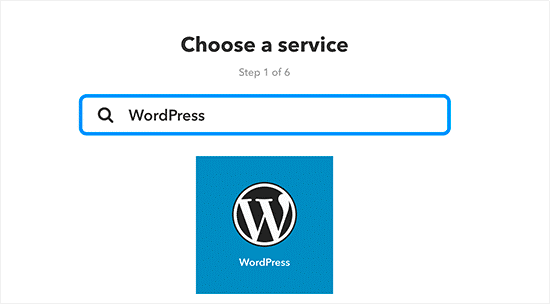
Now click on the +this link which will start the IFTTT wizard. When it asks you to choose a service then enter WordPress in the type box. In the next step, it will ask you to connect your WordPress site. Do it by clicking on the relevant button.
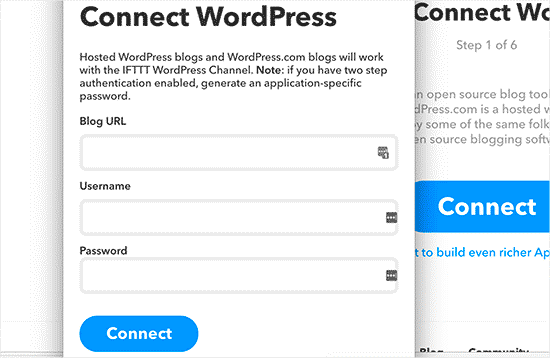
Enter your WordPress credentials along with the site address on the popup window. After providing this information, click the connect button which will enable IFTTT to save your information and connect your site.
In the next step, it will be possible to select triggers for your site. You can choose options like when a new post is published in a particular category or simply when a new post is published. To continue to click on any new post box.
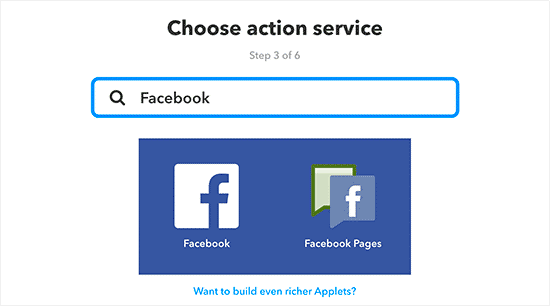
Now click on the +that link to continue. Here you have to select or search Facebook. Select Facebook if you intend to share your personal profile or select Facebook Pages if you wish to share a Facebook Page.
In the next step provide the necessary information on the generated popup window and connect your Facebook to IFTTT. This will enable you to see actions which you can conduct on Facebook and here click on ‘create a link post’.
Actions settings will be displayed here and you can manage the appearance of your posts for the Facebook platform. Facebook will automatically fetch description, post title, and thumbnail as you provide the post link.
Select the Create Action button and you have finally finished setting up the automatic posting of posts on Facebook through IFTTT. To exit the applet select the finish button and the wizard will end.
Use a WordPress Plugin to automatically share posts to Facebook
This method gives you superior control but it is a slightly lengthier process. Publication of your posts in certain categories or tags can be done through this method and you can also include the custom type of posts.
The first and the basic tasks include the download, install, and activation of the AccessPress Facebook Auto Post plugin. A new menu item labeled ‘AccessPress Facebook Auto Post’ can be discovered after activation in your WordPress admin bar.
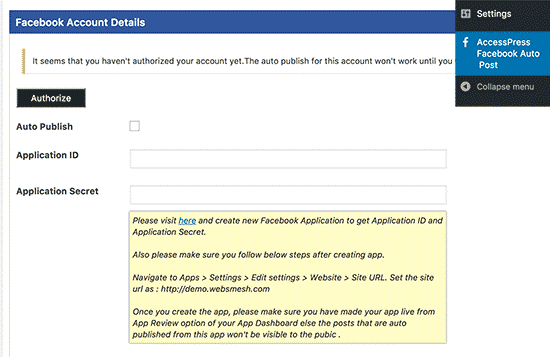
After you click on it you will be redirected to the plugin’s Settings page. In the next step, it is recommended that you check the box for the ‘Auto Publish’ option. For your WordPress site, this feature will enable auto-posting of your posts.
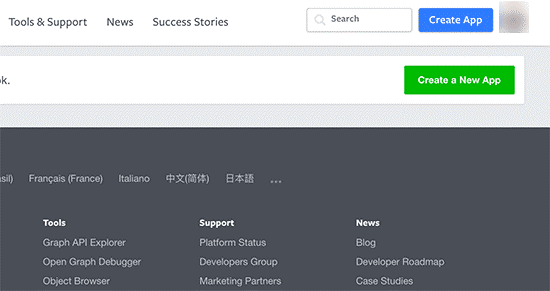
Moving ahead you will have to enter the secret keys and the Facebook application ID. By visiting the Facebook developer’s site you can easily access these keys. In the next step click on the ‘Add a new app button’ to resume this process.
Enter your display name for the app, email address, and choose a category on the popup window. There are no boundaries and you can freely select any category or name. To continue the process click on the ‘Create App ID’ button. After this step, Facebook will create an app for you.
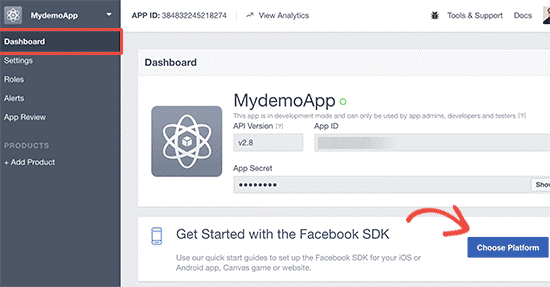
Click on the Dashboard link on the next screen. You will be able to see your ID’s and secret keys on the app’s dashboard where you will be redirected automatically. For viewing the secret key you will have to click on the show button.
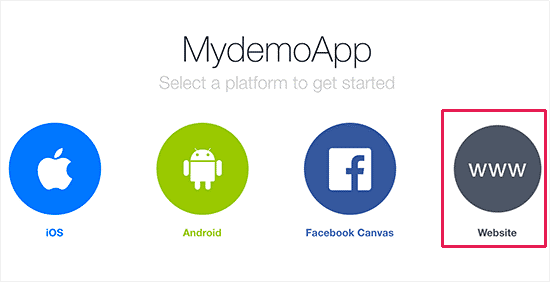
On the Plugin’s setting page of your WordPress site copy and paste these keys. Click on the choose platform button after returning to the app dashboard page. On the next popup window, you will have to select a website as your platform.
You will learn how to use the apps on a website with few codes snippets as you will be redirected to that page by Facebook. Now scroll down to the section labeled as ‘Tell us about your website’ section and enter your WordPress site’s URL.
To save your website URL and finish the setup wizard click on the Next button. Before you can use this app on your website there is still one last step remaining.
Visit the app Review page and click on the yes button for the option that indicates make your app public. Your WordPress site can now easily use the Facebook App. Enter the app id and the secret key by returning to the plugin’s Settings page.
Click on the save settings button and the changes will be saved on your platform. To successfully connect this plugin to your Facebook account click on the authorize button. Now you will be redirected to a Facebook page where you will see a pop up requesting for your permission.
You will be able to modify the setting about who can see the posts published by you on the app after you click on continue. You will be redirected to the plugin’s settings page on your WordPress platform after you have concluded with the permissions.
You will have to manually add the Facebook Account ID on the plugin settings. For finding the Facebook ID of your account you can use an online tool.
Other than this the other plugin settings are as usual and common. The auto-post types for publication on Facebook can be selected by you.
Automatically Share Posts to Facebook will now be enabled by this plugin completely based on your settings.
Related Article
How to automatically post images and posts/pages on Facebook?


