There is no doubt to say that social media has gained massive success worldwide. Thus, adding social media icons on your WordPress blog is essential nowadays.
Table of Contents
However, social media profile sections are not available on WordPress but you can add social media icons to WordPress.
In this post, we will discuss the WordPress navigation menu that allows you add social media icons to WordPress menus header.
Before jumping to the tutorial, one must know about the reasons for adding social media icons.
Why You Should Add Social Media Icons To WordPress Menus?
One of the biggest advantages of using social media icons to WordPress menus is you have a chance to connect with a larger audience without extra efforts.
Additionally, the biggest advantage of using social media is you can change the appearance of icons with a simple drag and drop button.
On the other hand, the third-party plugins can display social media icons in your sidebar too, in which most of the solutions are not flexible as you need.
Besides, the easy drag and drop feature allows you to easily add social media icons to WordPress menus. Hence, you can easily display it in the widget-area on your WordPress website including your footer section, sidebars, and more.
Now, let us take a look below to know how to add social media icons to WordPress menus.
Adding Social Media Icons To WordPress Menus
In this post, we will discuss two awesome resources that would help you add social media icons to Header.
So, let’s start with our first method which is the use of plugins.
Here’s how you can add social media icon with plugin
The very first thing you would need to do is installing and activating the menu image plugin. For more details, you can follow the given step-by-step guide.
- When the plugin is installed and activated you need to visit the WordPress Dashboard.
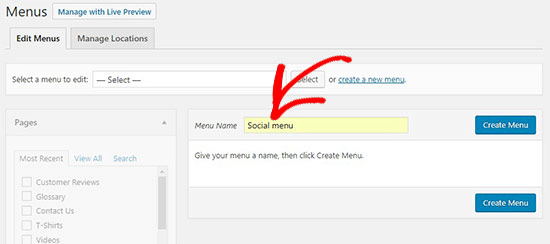
- Here you will need to visit the appearance >> menus page and create a new menu.
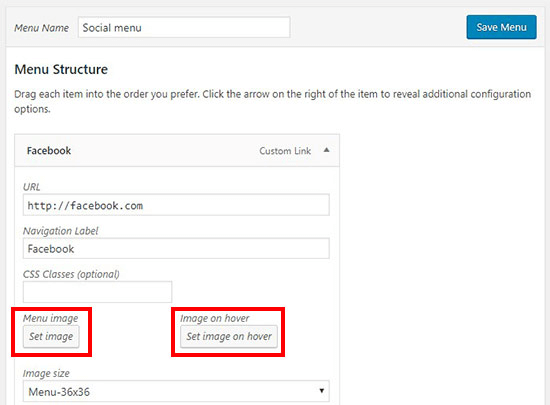
- In the next step you are required to add custom links for each social media channel you have or want to add in the new menu.
- Once done, you will see the menu image option under the menu item. These options can be used to upload your social media icon.
- This allows you to upload a different icon or main image icon to display.
- Now you can select the size of the social media icon. Here keep in mind one should add social media icons with the same size so it doesn’t break the menu section.
- Also you will need to select the position to display the icon with your social media channel. For instance, if you want to select the Hide button, this would display the social media icon without label. You can also choose the above/below option to show the social media icon as you need under the title.
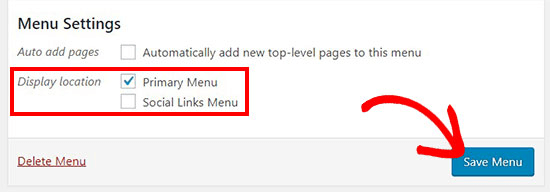
- Once you are done with settings, save the changes and you will see the social media icons are easily clickable on the screen or your WordPress site.
You can check the changes, if you want to make edits and add social media icons to WordPress then repeat the same process and preview the changes.
Do you know? You can also add social media icons to the sidebar.
Here’s You can easily add social media icons to sidebars with the following steps:
- Visit the WordPress dashboard and head to Appearance then widgets.
- Open the widgets page and drag the navigation menu widget in the sidebar widget area
- Now you see, in the select menu you have many options to choose from. Here you should choose the social menu that you have created above in steps.
- Click on the save button.
Once the steps are completed, you can see the social media icons to your site under the widget sections. For a more attractive look you can edit it via custom CSS. That’s all we have to follow to add social media icons to WordPress site.
Now, we are moving to our second method to add a social media icon which is linked to social media pages or without plugin in images.
To make this job done we need two things which are social media icons and links to social media profiles. Now, let us take a closer look at our given guide.
For instance, we are going to consider the Twitter icon to the WordPress. Note this process applies to any social media icons, not just for twitter.
Furthermore, you can even add multiple icons to whatever you like such as Instagram, Facebook, LinkedIn, Snapchat, Pinterest, etc.
Related Post: 28+ Best Social Media Management Tools For Small-To-Medium Business
So, here is a step-by-step guide to add social media icons to WordPress without Plugin
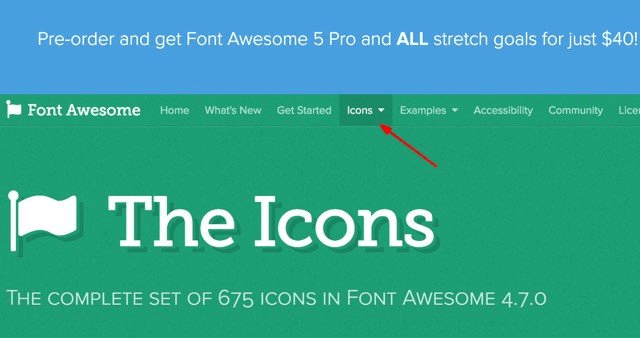
1. Choose Fontawesome or visit its official website to use it. This tool gives you customized features that instantly customize Size, color, and shadow of icons with the power of CSS.
2. Now choose the icons from the navigation menu
3. Scroll down the page until you see the search box. Now search for social media icons you want to customize or add in images. For instance, search for Facebook social media icons.
4. Take your mouse to the social media icon you want to use and it will turn into a green color.
5. When the cursor appears on the icon you can visit the new page and you will see the button that says “use this icon.”
6. Click on the Okay button to hover this icon or snippet code. Copy that code by using right click or from the keyboard by pressing ctrl+c.
7. With this you will see text is highlighted with blue and you’re ready to move to the next step.
8. Now visit the WordPress blog and this is the place where you have to paste that code snippet to add social media icon to WordPress without a plugin.
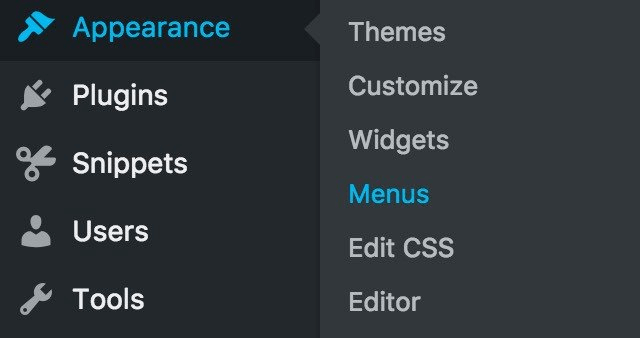
9. Open the WordPress Dashboard and head to appearance on the navigation menu.
10. Choose the menus option on the second layer of appearance.
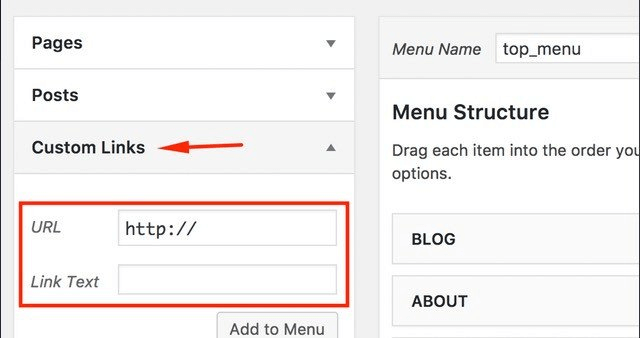
11. Under the menu you would need to choose custom links panel on the left side of the main screen to expand the widgets (where you will need to enter the URL and text)
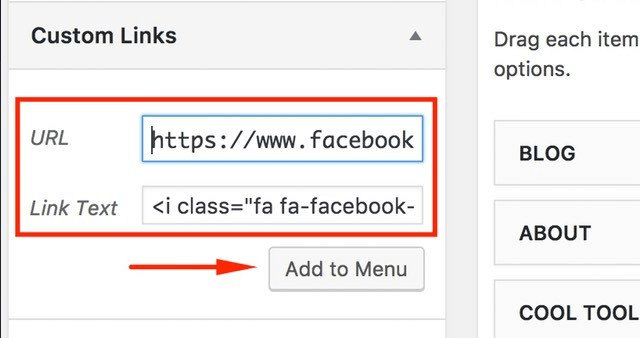
12. Under the URL field you have to enter the web address of social media like Facebook or Twitter. Here you have to paste the code you have copied from the Fontawesome and click on the Add to menu button.
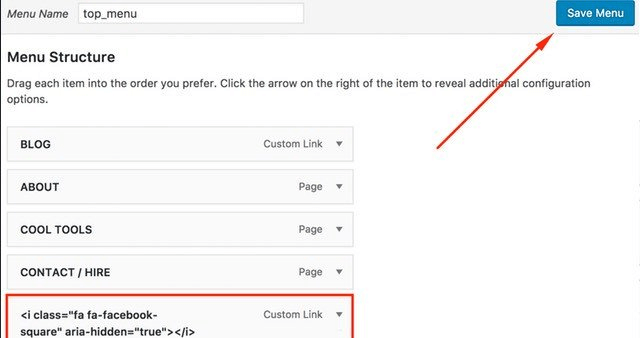
13. Once the changes save you can see the new menu item on your screen, where the navigation icons are heaped.
14. Go ahead with the on-screen details and save the changes.
Hence, you are able to see the social media icon in your WordPress.
Now we are coming to the main section which is adding social media icons to the header.
Here’s how you can add social media icons to header
- From the WordPress dashboard you will need to navigate appearance >> customize >> header >> primary menu >> and choose the last item in menu i.e. widgets.
- Once you have selected the widget option as the custom menu you can set your widgets with the steps such as appearance >> customize >> widgets >> header.
- You can choose from the list of widgets with any plugin.
- To add a social widget you have to add a plugin which is social media widgets from the plugins page.
To add social media icons widget plugin follows the give steps:
- Search for the social icons widget plugin
- Once it appears in front of you, click on the install button.
- This will take a few seconds, so when it is done activate the plugin.
- Now get back to the customizer and choose widgets then header.
- Add social icons widgets we have installed and customize it as per your choice.
- Choose from the links and click on the publish button.
- Once it is done, you can preview the changes on the WordPress site. If you want to edit, repeat the process and save the changes.
If you would need other plugins than you can try with external plugins like social icons widget by WPZOOM
How to open the social media icons in a new tab?
To make this happen one must follow the given steps:
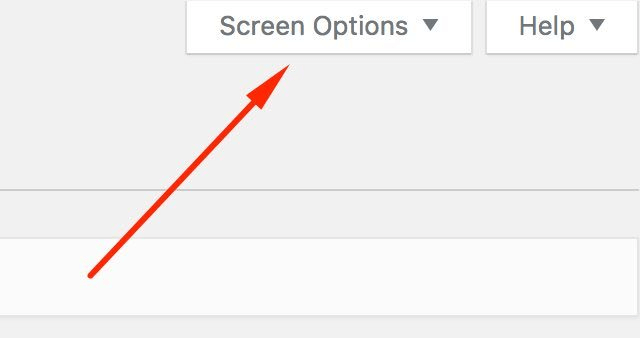
- Visit the WordPress dashboard and scroll the way and you will see the screen options at the top right corner of the window.
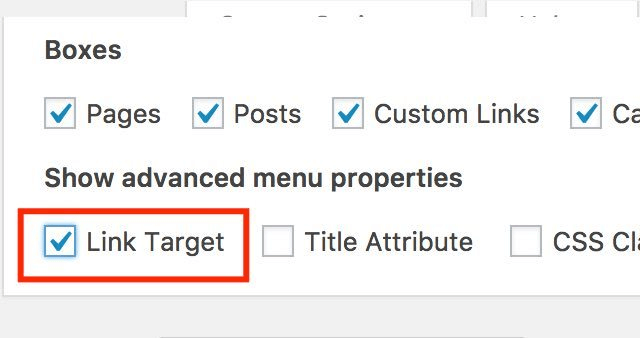
- Choose the tab option from the list and open it up.
- Now check the pages, posts, custom links, and more options you will see in the boxes section. However, check the link target option from the show advanced menu properties.
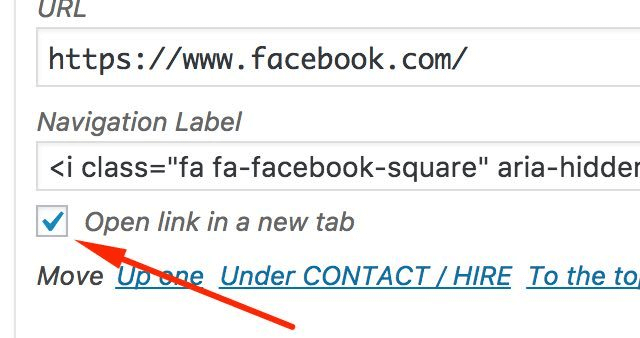
- Now the final steps -go back to the menu element and click the widget heading to open it up. Check the open link in a new tab.
Once done, your visitors will reach to another tab when they click on icons. So, this was the complete guide on how to add social media icons to WordPress header.

