You should definitely know how to customize your site design using child themes.
Creating child themes is considered to be the best way for customizing a site design. It is the safest way because if you create any grave issue during customization of the site design, you can re-upload the parent theme and get back the original site again.
A child theme also helps you to work offline and makes any required modifications and experimentations. But first, you need to know how to create a child theme.
How to customize your site design using child themes?
A child theme retains the design and functionalities of the parent theme. If you do not make a child theme and make changes directly to the parent theme, if you make some mistakes, the changes will be irreversible. Furthermore, if you take an update of the parent theme when it is made available, all the changes will be completely wiped out.
Creating a child theme
The first step is to create the child theme from any parent theme. On your hard drive, create a folder with the meaningful name of the child theme. Inside the folder, create a file named style.css. Open the file using any text editor and paste the following.
/*
Theme Name: My Child Theme
Theme URI: http://mysite.com/
Description: This is a custom child theme I have created.
Author: My Name
Author URI: http://mysite.com/
Template: parenttheme
Version: 0.1
*/

@import url("../parenttheme/style.css");
You need to change the above lines and replace them with appropriate information. Theme name should be the name of the folder you just created within which the file resides. You have to give the authentic URL of your existing website and similarly, the author name and its URL.
The template name has to be the name of the parent theme. Similarly, in the last line, the name of the parent theme has to be provided. Make sure you take care of the case sensitive letters else it might not work. Save the file and exit.
Transferring The Folder
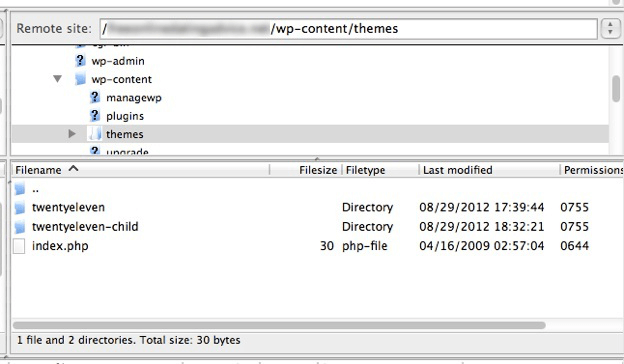
It is time to transfer the file from hard drive to web host WordPress installation folder. For that, you need to use an FTP like Filezilla and connect to your server and enter the folder WP-content and within it, you will find Themes folder, double click on that. Upload the child folder theme. Make sure the ultimate address should be wp-content/themes/childfolder/style.css.
Activating The Child Theme
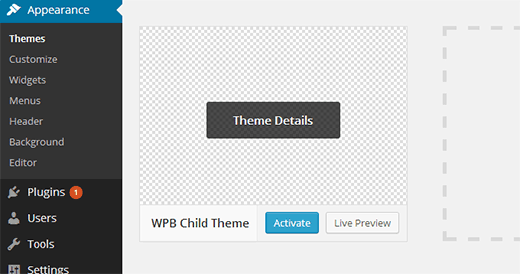
To activate the child theme, you have to go to Admin Dashboard and go to the left menu option Appearance. From the drop down, click on Themes. You will see your Child Theme already installed.
It is time to activate by clicking on the button. It is important to note that at this point, the child theme will be exactly the same as the parent theme as you have not made any change so far.
Customization Process
Most of the themes come with multiple CSS files, but the main one stays in the main folder, and it is the ultimate file to customize your site design using child themes. If you want to make any functional change, you have to customize functions.php file.
It is important to understand that different parent themes have different class and identifier names in CSS style file and to change them, you have to know the names to overwrite them and customize your site design using child themes.
How To Get The Code Of The Parent Theme To Overwrite Them?
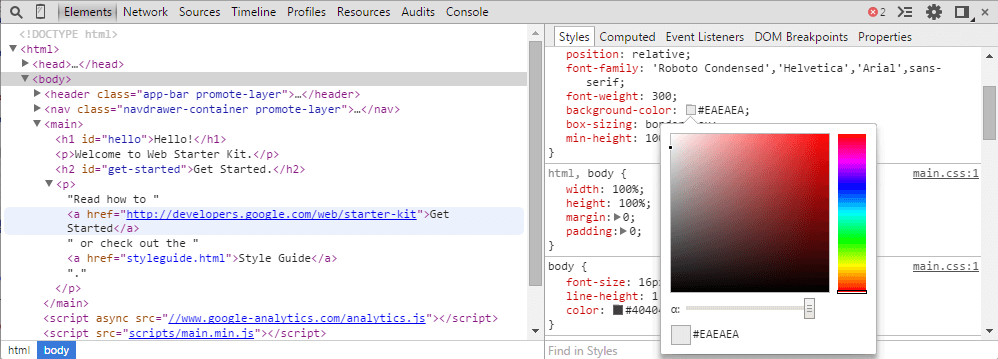
If you are using Google Chrome, you must be aware of the fact that it comes with code inspector which shows the code of any section of a website. So, what you need to do is to visit your web’s homepage from the web browser and press F12. The box will appear at the bottom and show codes.
Now, place your mouse pointer on the ‘Elements’(code lines) whose style you want to change.
Specific Changes
For example, you want to change the of the navigation menu. So, place your mouse pointer on the code lines inside Elements tab of the Inspector and find out which code represents the style of the navigation.
Once you find it, you have to note the ID. In most of the cases, the ID and Class are going to be same, and in this case, it is ‘navbar’. So, all you have to do is go back to the style.css file of the child theme and add the following piece of code.
.navbar {

background-color: #e8e5ce;
}
It is important to note that since the ID was ‘navbar’, we used the same identifier on the style.css. On some other parent theme, it could be something else instead of ‘navbar’ and accordingly you have to make changes. Save the file and visit your website again to see it.
Similarly, you can make changes to the footer background color or ever widget background color by writing the following piece of code.
.site-footer {background-color: #d8cdc1;}

.widget {background-color: #e8e5ce;}
Universal Changes
There are some elements which are universal for a website. For example, the anchor text color is same throughout the website. It has a particular color and style to make them noticeable.
It changes its color when you hover your mouse pointer over it or click on it. Making universal change is easy as they are same for all parent themes as they are general syntaxes of CSS. To change the color of anchor text, you have to use the following.
a:link – this is for link displaying.
a:hover – this is for the changing of color when you place your mouse pointer over the link.
a:visited – this is for changing the color for the already visited links.
Therefore, the code in the style.css file of the child theme should be like the following in case you want to change their colors.
a:link {
  color:#ff0000;
  text-decoration:none;
}

a:hover {
  color:#ff0000;
  text-decoration:underline;
}
Hope the process is clear and to customize your site design using child themes, you need to start learning about CSS and different attributes. Thank you.

